FTP Connection Details
When you choose the destination or source of your transfer as FTP server, you need to specify the FTP connection details to connect to the remote location.
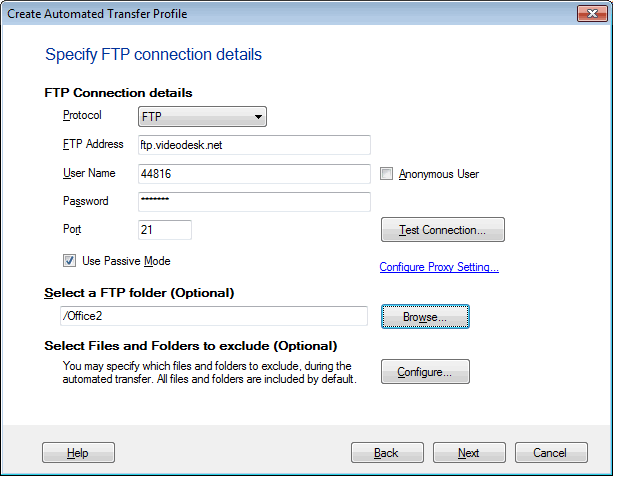
Enter the FTP Address which can either be a Host Name (Example: ftp.myserver.com) or IP Address of the FTP Server. If your PC is on Proxy server you need to provide IP address only. For example:192.182.1.81. If the FTP server requires one, enter the user name and password of your account.
The Server Port is the port on which Auto FTP Manager will try to connect to the FTP Server. This is normally 21; however, it may be different if you are going through a firewall, or if the FTP Server administrator has assigned the FTP protocol to another port.
You can also connect to the FTP server as an anonymous user. Auto FTP Manager selects the username and password as 'Anonymous' by default. Disable the option Use Passive Mode if you cannot connect to the server. If your machine is connected to the FTP server through a proxy, click Configure Proxy Settings.
Browse and select a destination folder for transfer which is located on the FTP server. If you leave this area blank, Auto FTP Manager will use the FTP server's default folder for your account
Proxy Settings
You can connect your PC to Internet either through a Proxy server or directly.

Select Direct Connection from the Connection Type dropdown if no proxy is used. There is no need to provide Host IP Address and Proxy Port. When you connect through a proxy, specify the Proxy IP Address and Proxy Port. You can choose SOCKS v4 or SOCKS v5. Specify Username and Password if required.
To get the default proxy on your machine, click Auto Detect.
|