Configuring MPEG 1 Properties
MPEG (Moving Picture Experts Group) version 1 is a widely-supported media compression standard. MPEG 1 helps when you want to distribute your video files. You can play MPEG movies on almost any players such as settop players, PCs, PocketPC, etc.
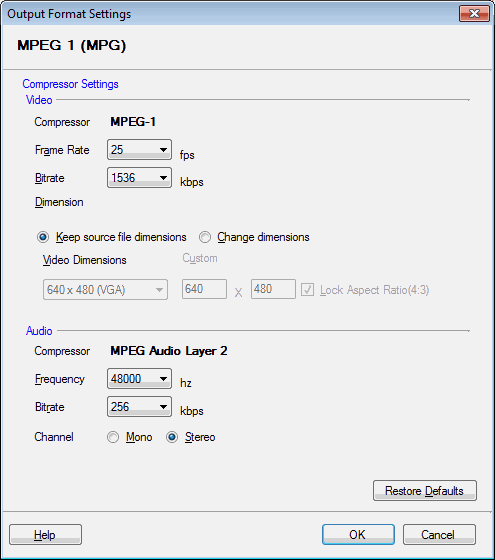
To configure MPEG 1 conversion settings, click Formats >> Select Standard Formats >> MPEG 1 Custom >> Configure.
It produces larger files and lower quality video than some of the newer compression systems, such as MPEG 4.
NTSC is the video standard used in United States, Japan, Canada, and most of the Latin America. PAL (or SECAM, which is very similar to PAL) is used in UK, Europe, Australia, and most of Asia. Constant Bit Rate (CBR) MPEG 1 files use the same amount of disk space to store each second of audio and video. Variable Bit Rate (VBR) compression lets complicated video and audio use more space, but reduce the space used for simple segments. This lets the quality be higher without making files larger.
Read the article: Convert Between PAL and NTSC
|