It may be the case that you may only be interested in a part of a lengthy media file. For instance, you want a particular song or an audio portion from a long recording. Converting the whole media file just for a small portion may take a very long time. You can divide the files into smaller parts with Split Media tool, and add only the required segment for conversion.
Click Tools >> Split File.
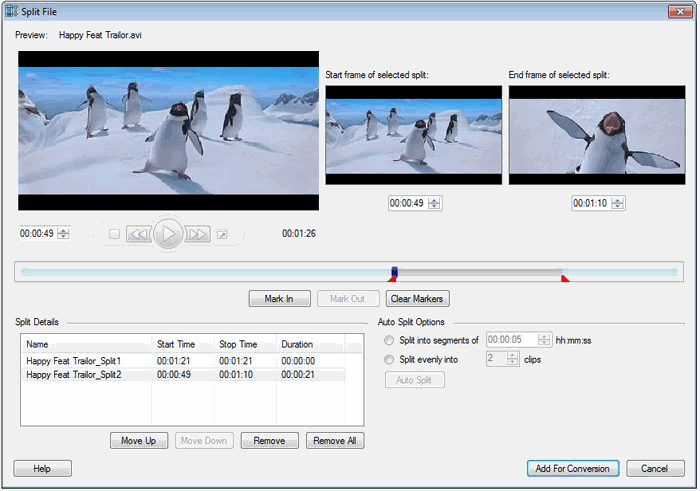
You can split a file manually into any number of parts. In the Split File window, you can preview the video that has to be split. Markers are provided to select the start and end frame of each split. Create a segment by moving the slider to the desired position and click the Mark In and Mark Out buttons to select the start and end frames of the segment.
To reset the markers, click Clear Markers button. Repeat the procedure to create multiple segments of your media file.
The program helps you to split files evenly into segments by time or into two or more parts. To split the rfile into equal time intervals, choose the option Split into segments of. In this mode, you need to specify the duration in hh:mm:ss format.
If you want to split the media file evenly into a preset number of parts, choose the option Split evenly into. You have to specify the number of segments you want to split the file.
On clicking the Auto Split button, the clips are added to the Split Details list so you may examine it before proceeding with the splitting.
Add the splits to the conversion list with the Add For Conversion button.
Suppose you have split a video and added the part for conversion. You have an option to modify the duration of a split that you have already added in the conversion list. Select the part of the video from the conversion list, and click Tools >> Split File. The markers are already placed at the positions you had previously set. You can move these markers to modify the duration. Once you have set the final positions, click Add For Conversion.