How to Enable the Microphone and Speakers
To enable the Microphone and Speakers in Windows 7/8/10
Click on the Configure Recording Device icon  from the Recording Options dialog and follow the steps given below: from the Recording Options dialog and follow the steps given below:
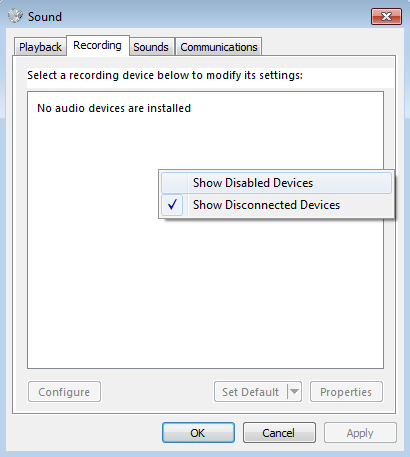
1. Right click and select Show Disabled Devices.
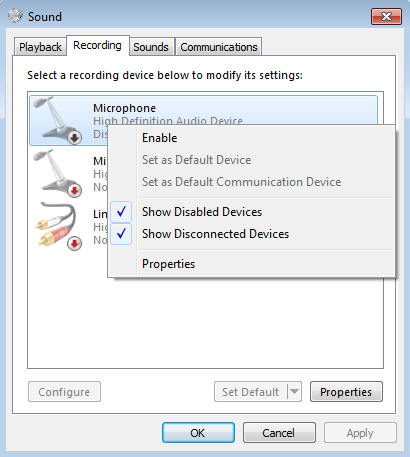
2. Right click the device and select Enable.
At times, even after enabling the sound devices, they may not work properly. You may need to update the sound drivers for the devices. When your sound drivers are successfully updated you can follow the steps listed above.
How to record PC screen with both Microphone and Speakers
To check sample rate and bit depth settings of Microphone and Speakers in Windows 7/8/10
If you have selected both Record microphone audio and Record system audio (Speakers) options then make sure both devices should have same sample rate and bit depth.
Click on the Configure Recording Device icon from the Recording Options dialog and follow the steps given below:
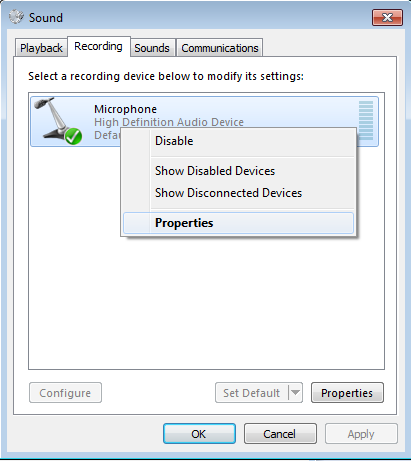
1. Right click on recording device and select Properties.
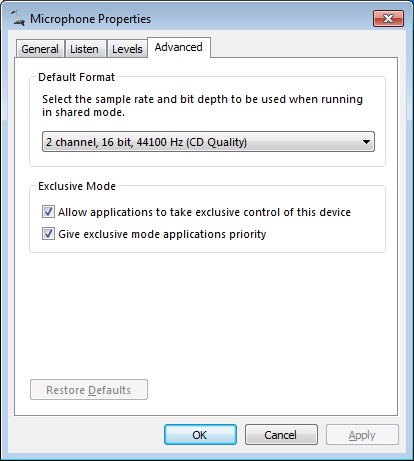
2. Click on Advanced tab and check 'Default format' section for sample rate and bit depth. Microphone and Speakers should have same settings of sample rate and bit depth.
For Microphone:
For Speakers:

Once you select the same sample rate and bit depth for microphone and speakers, screen recording will be performed with both the devices.
|