Publishing Media Files
You can publish your media files to your web server or video hosting services like Video Desk. Publishing to a streaming server like Video Desk allows you to track your viewers. They do not need to download your recordings to view them.
For web publishing, you should use FLV format, since they produce small files and can be viewed in every browser. The media conversion wizard allows you to convert your files to FLV with custom profiles tailored for web viewing.
To create recordings for web publishing, record only the window of the application you are demonstrating, instead of the entire desktop. This reduces the dimensions of the screen recording so that your viewers can easily see the presentation over the internet. If you have to record the entire desktop, then consider recording at a low resolution, so the presentation can be easily viewed without scrolling.
To publish your media files to the FTP server:
Click Tools >> Publish. Add the files to publish, with the Add button, or by dragging and dropping the files in the list.
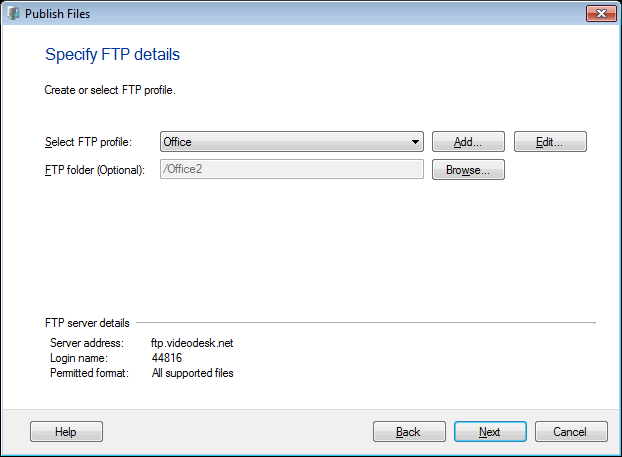
FTP Profiles define how to connect to a server and where to copy files to. In the Publish Wizard, click Add button to create a profile.
You may select a folder, to upload files on the server by clicking the Browse button.
How can you create a new FTP Profile
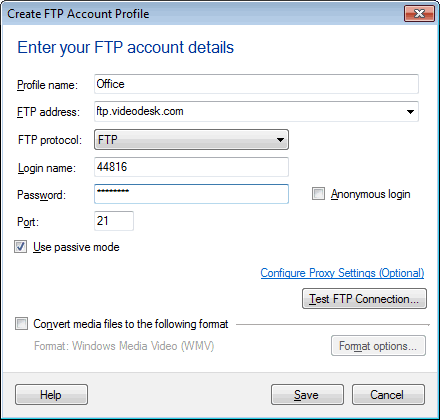
Fill in the details such as the profile name, the FTP address where you want to publish your files, the login information needed to connect to the specified FTP server and the port number to connect to the server.
The computer may connect to the FTP server via a proxy. If your computer connects to the FTP server via a proxy, you can configure the proxy settings using the link Configure Proxy Settings. Confirm, if the connection to the specified FTP server can be established or not, by clicking the Test FTP Connection button.
It is recommended to disable the Use Passive Mode for logging in option, unless the application is unable to log in to your server.
Check Anonymous login if you are uploading to a server that doesn't require individual accounts with passwords.
Note: Files uploaded to an anonymous FTP server are generally visible to and downloadable by anyone.
If your FTP server allows to publish only certain file formats, then you can choose to convert the files to the permitted format by checking the option Convert media files to the following format. Configure the conversion details by clicking the Format Options button.
You can view the Publish Log to get the details of the interaction with the FTP server. The status of the publishing process can be reviewed using the Publishing Details link.
|