|
Configuring Video Recording Settings
The Video Recording option records the video images of the camera when an alert is triggered and saves it in MP4 format.
To configure video recording settings, click Camera >> Manage Cameras >> Edit Camera >> Actions >> Configure button of Video Recording action 
Video Recording Options
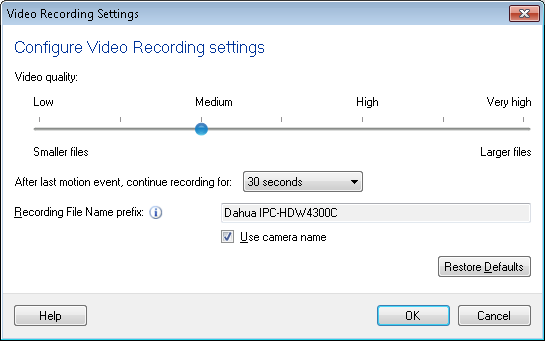
Recording Quality:
By default, for IP camera you can record the video at a bit rate of 225 Kbps (Medium). You can choose the bit rate as 75, 150, 225, 300, 375, 450, or 525kbps. Your USB videos are recorded at a bit rate of 700 kbps by default. For USB select the bit rate as 500, 600, 700, 850, 1000, 1125 or 1250kbps. The quality of recording depends on the bit rate you select. High bit rates result in clear and sharp recordings, but large file sizes. Low bit rates give small file size recordings, but the quality may be reduced. Generally, you should use high bit rates with high resolution cameras and high frame rates. When you have a low-resolution camera and low frame rates, using lower bit rates will give acceptable recordings.
Recording duration
-
Recording on motion detection
Specify the recording duration in seconds that you want to record after motion detection. After motion detection, video will be recorded for the time selected in After last motion event, continue recording for N seconds option.

-
Recording on license plate detection
Specify the recording duration in seconds that you want to record after a license plate is detected. After license plate detection, the video will be recorded for the time selected in After license plate is detected, continue recording for N seconds option.

When recording is in progress and motion is detected within N seconds then the program continues recording for next N seconds. If the motion is not detected within N seconds then the application will stop and save the recorded video.
-
Recording At regular time interval
At regular intervals, you can record video After every N minutes for M minutes, as shown below:

If you have selected M minutes from the above duration drop down and monitoring at N minutes interval is selected then a recording of M minutes duration will be created. After waiting for N minutes, again a video will recorded for M minutes and this will continue until monitoring is stopped.
Recording File Name prefix:
The video recordings are saved with the camera name as the prefix. You can pick a meaningful prefix that helps you identify the files, such as "Storeroom" or "FrontHall". The Date and Time of the video is appended to the file name automatically.
To start the video recording, click Actions >> Start Recording.
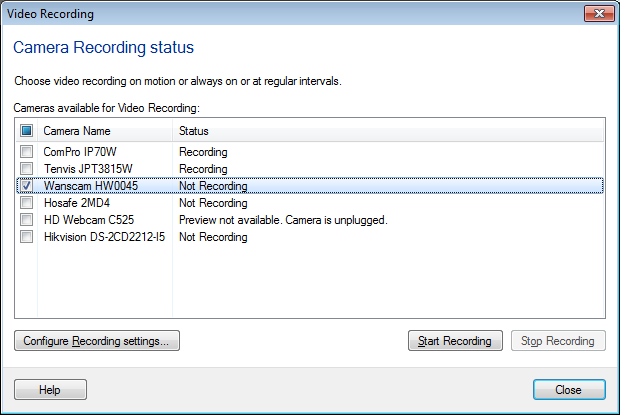
You can see a list of cameras added in the application and their current status. You can select any or all of the cameras in the list and click Start Recording. You can see the recording status of the cameras in this dialog screen. To cancel a video recording, click the Stop Recording option. To configure the camera for video recording, select it and click Configure Recording settings.
|