Convert your PowerPoint Presentation to Video
The most effective way to present your PowerPoint is to demo it “live” to the audience. However, it may not be possible for you to be there “live”. Sometimes, you cannot be physically present at the event. So the next best option is to convert your PowerPoint presentation to a video format which can be played back on any media player. Your audience does not need PowerPoint installed to view the presentation.
This article describes how to use My Screen Recorder to convert your PowerPoint presentations to a video format. My Screen Recorder is a screen recording application that captures the PowerPoint presentation as you move through the slides to either WMV or AVI format. You could add your own audio narration as you flip through the slides in your presentation. My screen Recorder allows you to capture your own audio narration using a microphone. While PowerPoint does allow you to add audio narration to your slides, it does not use audio codecs to compress your narration as in My Screen Recorder. As a result, lengthy presentations can produce large sized files.
There are many benefits of converting your PowerPoint to a video format. You can easily make your presentation available on the Internet for wide distribution. Upload and share your videos to YouTube and blogs. Instantly view and listen to your presentations on several popular multimedia devices that support WMV and AVI formats.
Converting your PowerPoint presentation to WMV format
To convert the presentation to a WMV file, open the PowerPoint presentation that you want to capture. Start My Screen Recorder and make sure that you have chosen to capture Full Screen by clicking File >> Record >> Full Screen.
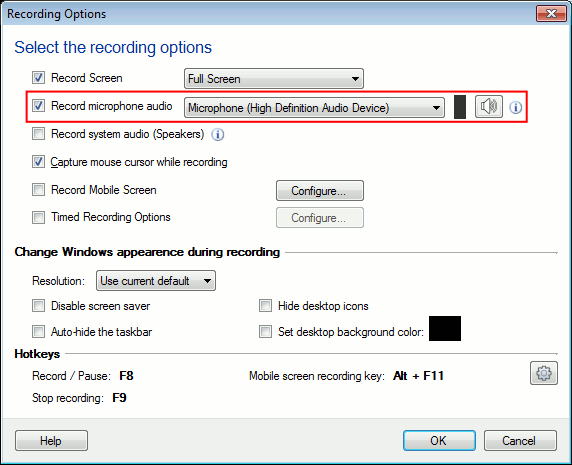
When you are ready with your PowerPoint presentation, press F8 to start recording. Run the slide show at an appropriate speed. As you capture the slides, you can add your voice narration with My Screen Recorder.
When you are finished with the slide show, stop the recording using the F9 keyboard shortcut.
Once you have converted your PowerPoint to video, you can conveniently play it anywhere. My Screen Recorder provides you the freedom to demonstrate your presentations, even on PCs that do not have PowerPoint installed. Now you can easily distribute your video presentation on YouTube or place it on DVD.