|
Splitting Timeline
With the Split Timeline option, you can split more than one track at once. To split a single track only, the Split Track option is more convenient to use. Unlike the Split Track option, this option splits the Timeline at the seek slider position.
To Split the Timeline:
- Drag the seek slider to the position where you want to split the Timeline.
- Unlock all tracks that you want to split.
- On the Tools menu, click Split Timeline. You may also use the F11 shortcut key or the Split Timeline button on the toolbar.
- When you Split the Timeline, this window appears:
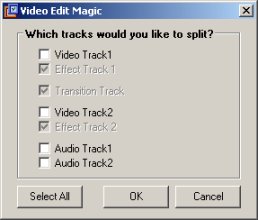
You can choose to split all the tracks, or any set of tracks. The Effect Tracks and Transition Track will always be checked. If you split the Video Tracks, these tracks will also split.
|