Recording a particular Area of Your Desktop Screen
My Screen Recorder captures your PC desktop activity into standard WMV or AVI video files. It records everything you see on the computer screen, including the entire desktop, windows, menus, cursors - even video with sound. There are many occasions where you may want to record the activity within an application window. Recording the activity within a single window has many advantages.
- The viewer is focused on what you are trying to present.
- Privacy of your full desktop is maintained.
Using this feature, you can produce files that communicate more powerfully. With proper recording settings, these files can also be smaller, using less storage space and Internet bandwidth.
Just follow the steps below to record only a part of the Windows desktop:
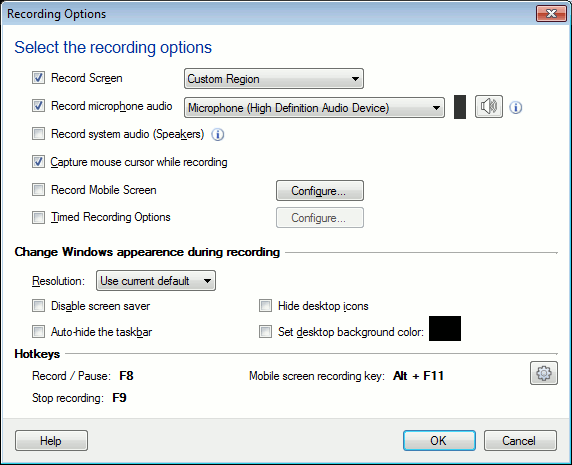
Step 1: Use the Region Feature
- After launching Deskshare My screen Recorder, Click on Record feature to choose the dimension of the screen to record
- Select a Custom Region option and click on OK button.
- As soon as you start recording, a crosshair appears on the screen.
Step 2: Select Your Recording Area
- Click the mouse without moving it, My Screen Recorder will automatically select the window beneath the crosshairs.
- Any window within the boundaries of the Crosshair is automatically selected.
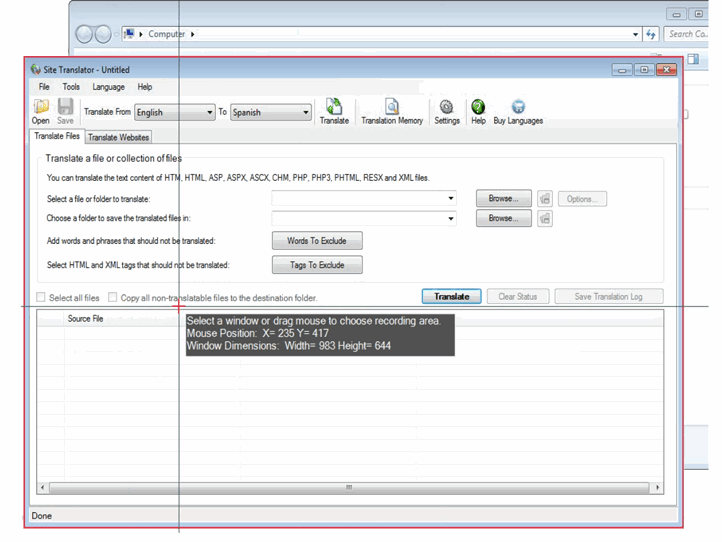
Step 3: Define your own custom region
- You can select any region of your desktop with the help of the Crosshair.
- Click and drag the mouse to draw a rectangle around any area of the screen to record that area.
- You will see the dimensions of the current rectangle in pixels.
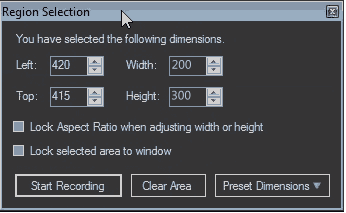
Step 4: Select your options and Start Recording
- When you select a desired Recording Area, Region Selection dialog box appears.
- Choose a fixed size from the Preset Dimensions to quickly access the last recorded dimensions or default windows dimensions.
- Select Lock selected area to window to record everything that happens to one application.
- Select Lock Aspect Ratio when adjusting width or height to maintain the aspect ratio of the selected region.
- Select Clear Area if you are not satisfied with your selection and drag your mouse on the screen once again.
- At last Click Start Recording and enjoy the ride.
Every screen recording should be designed to convey a particular point. By focusing the viewer's attention on a smaller area, recording from a region in My Screen Recorder can make your movies more effective and powerful. Additionally smaller files are created which are easier for people to work with and watch.