Recorded Actions
You can record the transfer actions that you perform in any existing profile, a Quick Connect Profile or an Automated Transfer Profile. Actions like moving, deleting and renaming files can be recorded. The recording is saved as an Automated Transfer Profile, and when run will repeat exactly all the actions that you recorded.
You can edit, add new actions and perform other operations on the recorded profile. This profile does not have Action Rules, Conflict Resolution, Filters and Include/Exclude sub-folder options as in a standard Automated Transfer Profile. Instead, you can add or edit specific actions like "Copy file name.ext from Folder 1 to Folder 2."
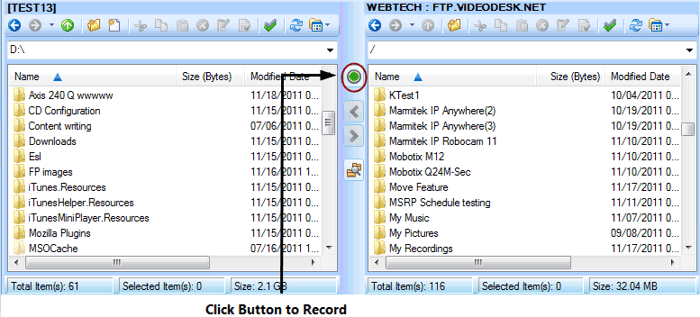
To create an automated profile by recording, right click any existing Quick Connect Profile or Automated Transfer Profile from the profile list and select Open File Manager. Once the File Manager is open, click the green button between the two panels. This button turns red to indicate that recording has started. Perform the actions you want to record such as moving, deleting, and renaming files. Once you are done, click the red button to stop the recording.
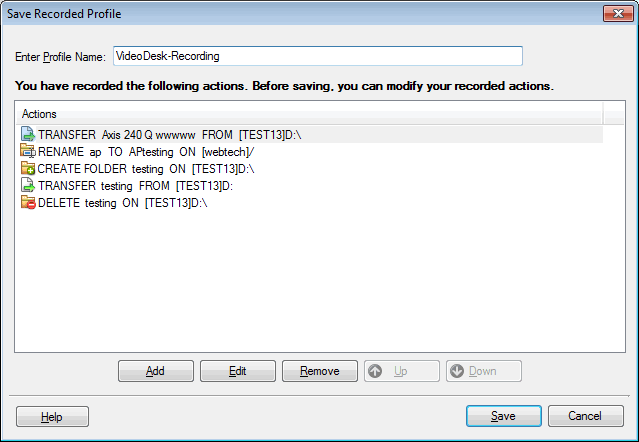
A list displays the details of actions that are recorded. You can edit the profile before you save it. In addition, you can add a new action, remove an existing one, and change their positions in the list. You can modify the order of the actions with Up and Down buttons.
When you click Add, you can select the Action type you want to include in the profile such as Transfer, Delete, Rename, Move, or CreateFolder. When you choose an action to add, specify the folder details accordingly. For example, if you want to create a new folder, choose the destination folder location with the Browse button and a name for your folder.
Click the Save button to save the new profile. The new recorded profile appears in the Automated Transfer Profile list.
|