|
What is a Profile?
A profile is created for every FTP site that you want to manage. Auto FTP Manager stores the following information in a profile:
- Connection details like FTP Server Name, User Name and Password.
- The location of files and folders to transfer. They can be transferred between PC to FTP Server, PC to PC, and FTP Server to FTP Server.
- Action rules and filters.
How to Create a FTP Connection Profile
You should begin by creating a Profile for each FTP server that you will be working with. Profile contains the necessary information to connect to the server. You can create 3 types of profiles: Quick Connect Profile, Automated Transfer Profile, and Scheduled Profile.
- A Quick Connect Profile is used for manual transfers, and contains only connection information.
- An Automated Transfer Profile performs transfer actions automatically once started. You can transfer files from a remote folder to a local folder, from a local folder to a remote one, or synchronize folders. You can also record actions, and repeat those actions automatically.
- A Scheduled Profile is an Automated Transfer Profile that starts automatically using scheduler. Using Automated Transfer Profiles, Auto FTP Manager can perform file transfers with no intervention by an operator.
Click File >> New Connection Profile. Select the profile type as either Quick Connect or Automated Transfer.
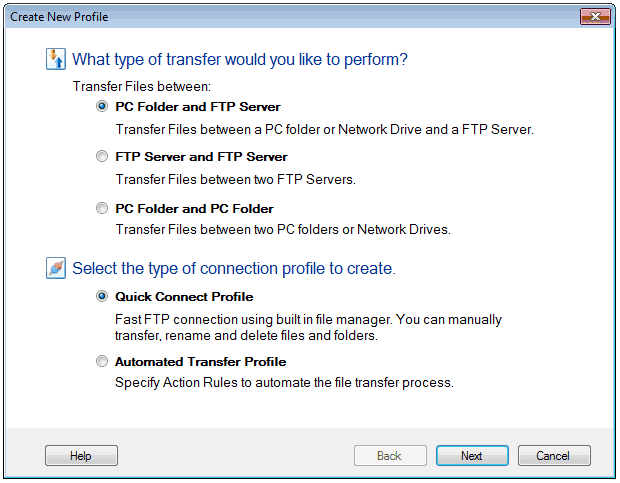
The next step is to specify the two folder locations to transfer files. Both the folders can be either on a PC or on an FTP Server. Depending on the type of transfer that you choose, you need to specify the corresponding details on the next screens. For example, if you choose to transfer files between PC folder and FTP server, you need to provide the path of the folder and FTP connection details.
|