Cropping
Video Edit Magic can "crop" a media source on the Timeline. That is, you can mark a section of the Timeline, and keep only the part between the Selection Sliders, discarding everything else. You can crop the contents of any or all tracks.
To crop, either click the Edit menu and choose Crop, or click the Crop button: 
Read the article on Editing Techniques to Remove Unnecessary Footage.
When you Crop a selection, a window appears letting you choose which tracks to crop.
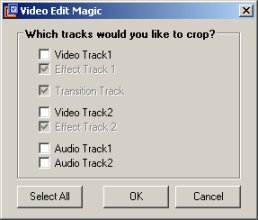
Check the checkboxes for each track you wish to crop. Note: if you crop a track, everything in that track which is not inside the Selection Sliders is deleted, which can include several different media sources. The checkboxes for the Effect Tracks can never be unselected. If you crop a Video Track, the corresponding Effect Track will always be cropped as well.
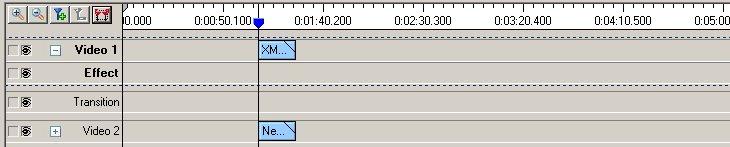
Before Crop

After Crop
|