Monitor Multiple IP Cameras with Security Monitor Pro
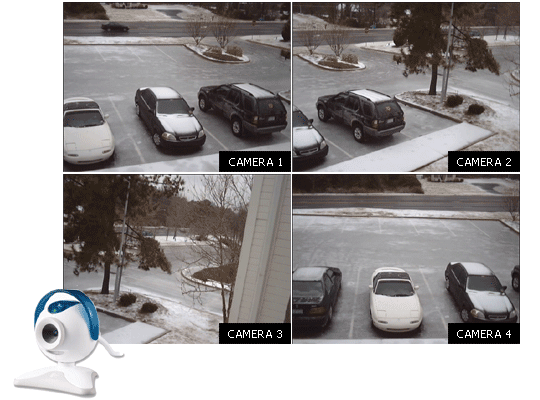
Does your organization need a video surveillance system for multiple locations? Traditionally, CCTV (Closed Circuit TV) video security system needs cameras to be wired to a central monitoring station. It becomes very expensive and difficult to wire multiple buildings over longer distances. IP cameras solves the long distance problem since they are connected to the Internet. IP cameras can be anywhere with an Internet connection, even in a different city.
With Security Monitor Pro, you can monitor several locations using multiple IP cameras. Over 1000 different IP cameras models are supported.

Setting up the IP Cameras
The first step is to decide the objectives of your video surveillance setup. Start by answering the obvious, important question, “What is the most important thing to monitor?” It could be cash registers, the front door, the warehouse, a parking lot, or the conference room. The next step would be to identify the entry, exit and other vulnerable points around your subject. Once you identify these points, you can determine the number of cameras required.
Now, it’s time to physically place and set up the cameras. Keep in mind that IP cameras will need both electricity and a network connection. If they’re wireless (WiFi) cameras, make sure the location you place them has good signal strength. For details on choosing a security camera refer the article Selecting a Security, Surveillance Camera: CCTV or IP Camera. Add your cameras to Security Monitor Pro by clicking Camera >> Add New Camera. Once the cameras are added to the program, you can use the Preview windows to position them and be sure you have complete coverage. The effectiveness of your video surveillance depends on the coverage.
Using Security Monitor Pro with IP Cameras in remote locations
You may need to monitor IP camera's in multiple locations over the Internet. In order to use a IP Camera, you have to know its IP Address and HTTP Port number. IP addresses (network addresses) will look like 192.168.0.20, a set of four numbers separated by periods. When you install a IP Camera, you will set its IP address and port number according to the camera manual. To make a camera visible over the Internet usually requires you have a public IP address assigned to your camera. If your IP Camera is behind a router, you have to configure the router with “port forwarding”. There is information on configuring many of the most popular cameras and routers for port forwarding at PortForward.com.
Simultaneous Monitoring
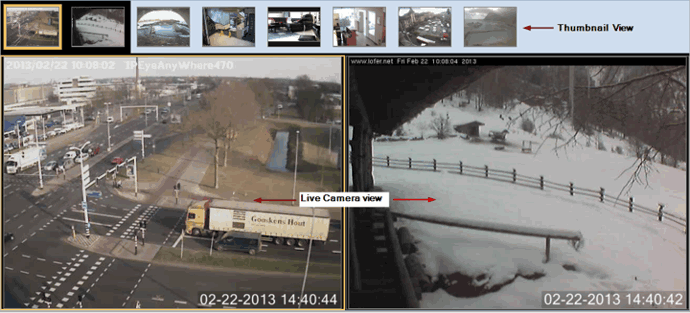
Security Monitor Pro can preview, detect motion, record video, and take photos from multiple IP Cameras at the same time. The Camera Thumbnail View bar shows a reduced-size preview of each camera. The exact number depends on the window size and your screen resolution. You can simply click the thumbnail to see a larger preview of that camera.

Scheduling Cameras
If you are monitoring multiple locations, each spot may need a different schedule. For example, one camera may be on the sales floor of a store and need to be deactivated from 8:00am to 9:00 pm so that false alerts aren't triggered by customers and staff. Another camera monitors the rear door of the building and needs to be deactivated from 6:30 am to 5:00 pm when deliveries arrive. If the cameras are in different buildings, they could even be in different time zones.
Security Monitor Pro lets you set an individual schedule for each camera or a single schedule for all of the cameras. The advanced scheduler gives you complete control—you can set a different schedule for each day of the week, and set it for special one-time events. For instance, keeping a camera monitoring on a holiday when it would normally be deactivated.
To schedule a camera, click Tools >> Scheduler. You can specify a new schedule with the Add button. The cameras can be scheduled to start monitoring for motion or a video recording at a specified time. In addition you can choose for broadcasting and taking photos of the event.
You can schedule a camera to start the specified actions either daily, weekly, just once, or on an application startup. For example, you can start and stop the actions at the same time every day, say start at 7:00 pm and stop at 7:00 am.
Each camera can be scheduled individually or all at once with different Alerts. For instance, you might want the camera on your sales floor to take photos at regular intervals during store hours to monitor staff. You won't use motion detection because there will be a lot of motion on the floor when the store is open resulting into false alerts. A camera watching a parking lot might use motion triggering and record video. If a camera is detecting night-time intruders into a warehouse, you might configure Security Monitor Pro to ring an audio alarm and send e-mail to the Security Manager. You’ll need to choose actions that are appropriate for each camera and change the settings accordingly.
Example
Let’s set up a surveillance system for Birdbath Bliss, a store for lovers of wild birds, selling birdbaths, birdhouses, and birdseed. The business consists of an outdoor display area for birdbaths and large birdhouses, an indoor sales floor, a small office, and a warehouse. Each of these areas will be protected by a camera.
The first step is to select and place the cameras. We can use an inexpensive USB camera that plugs directly into the computer. The others will all be wireless IP cameras. For the outside display area where vandalism is a concern, a camera with low-light capabilities is a good choice. The other three cameras don’t need this because some interior lights will be left on.
Now that the Preview for each camera is visible, we can carefully position them for the best possible coverage of the areas they’ll be monitoring. When placing the outdoor low-light camera, it’s important to place and point it so that it won’t be blinded by the headlights of passing cars.
Once the cameras are in place, it’s time to configure each device. Here are the configurations for this example:
Outdoor Display Area
When setting up a camera, it’s important to consider what it’s protecting you against. For the outdoor product area, the primary concern is vandalism—birdbaths and large birdhouses aren’t common shoplifting targets. We’ll set up a well-concealed camera with the following settings:
- Trigger Alerts when motion is detected
- The Alert starts video recording. Whenever motion is detected, the program records for 2 minutes or until the motion ends, whichever is more.
- Alerts also send an Email notification including JPEG photos to the user’s account informing him that motion has been detected. If it’s a real emergency the owner can call the police.
- Schedule: monitoring starts at 7:00 pm and ends at 5:30 am.
Warehouse
There are two primary security concerns in the warehouse: employee theft during the day, and break-ins at night. To guard against employee theft, the camera can be set to record continuously during the day.
Security Monitor Pro supports monitoring and recording from multiple cameras simultaneously. The application has a user-friendly interface and is ideal for monitoring large areas and business premises. Its scheduler gives you full control to configure each camera independently. Securing your assets was never so simple, effective and inexpensive.