|
Menu Bar
Using Menus, you can access all the features provided in the application. This section describes all the items of main menu. The Menu Bar is divided into following sections:
- File Menu: General operation controls.
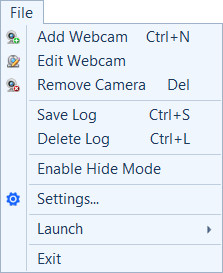 |
- Add Webcam: Guides you through adding a camera and configuring actions.
- Edit Webcam: Change or correct camera settings, alerts, labels or mask.
- Remove cameras that are not being used.
- Save log: Save the Event log to preserve it.
- Delete log: Clear all the Event entries generated.
- Enable Hide Mode: WebCam Monitor will run in the background without displaying an icon on the screen or in the taskbar.
- Settings: Configure general settings.
- Launch Menu: You can launch other Deskshare applications.
- Exit: Stops all the running actions, preserves the camera settings for the next use and closes the application.
|
- Actions Menu: Quickly start actions like Video recording, Monitoring, and Broadcasting for the selected camera.
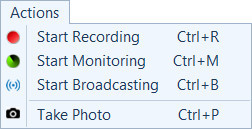 |
- Start Recording: Start or stop recording for the selected camera.
- Start Monitoring: Start monitoring actions on motion detection or on regular time intervals. This option will toggle with Stop Monitoring.
- Start Broadcasting: Start or stop live video broadcasting for the selected camera.
- Take Photo: Capture a image from the selected camera manually. You can also use the shortcut key Ctrl + P.
|
- View Menu: Control camera layouts and view upload and broadcast status.
- Properties Menu: Change camera, video and audio properties.
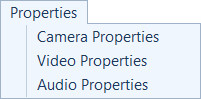 |
- Camera Properties: Set image properties such as saturation, brightness, contrast for cameras.
- Video Properties: Configure video properties such as resolution and frame rate.
- Audio Properties: Adjust volume.
|
- Tools Menu: Tools menu includes following items:
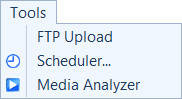 |
- FTP Upload: See which cameras are uploading files and view any pending uploads of videos and photos.
- Scheduler: Schedule actions such as monitoring, video recording and broadcasting for each camera to occur at a specific time.
- Media Analyzer: View recordings and photos from all cameras.
|
|