Automatic Uploading of your Recordings
To automate the uploading process of your screen recordings, click Tools >> Upload and select the option Auto Upload in background any newly created recordings and on the next page enable Upload my recording after it is created to my default FTP account option. All your newly created screen recordings will be published to FTP server in the background automatically.
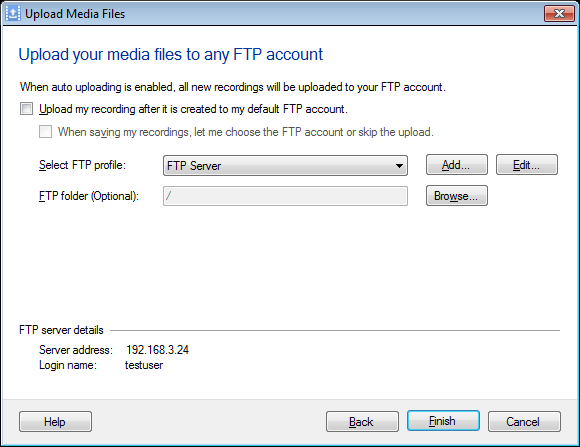
FTP profiles that are created for uploading media files are displayed in a dropdown list. You need to select a profile from this list before uploading the media files. When you connect to the server using the appropriate profile, you can select a location on the server to save the media file by clicking Browse. Once you have specified the profile and the folder (optional), your media file is ready to be uploaded. You can choose for a confirmation dialog to appear by enabling the option When saying my recordings, let me choose the FTP account or skip the upload.
Auto Upload Log
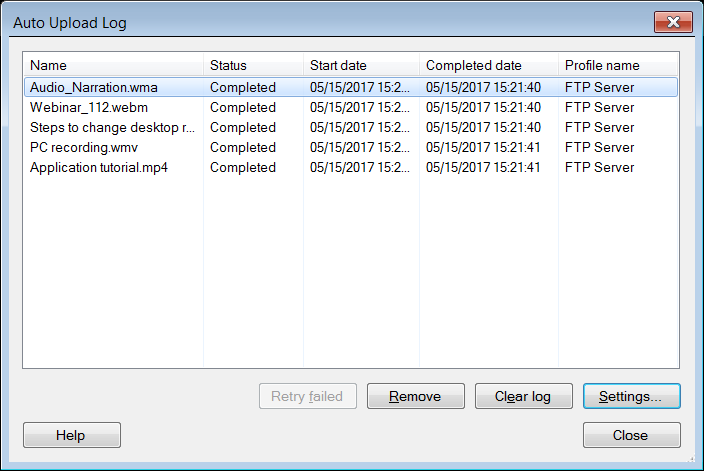
You can view the status of the files, through the Auto Upload Log. This log lists the filenames, completion status of each media file, the date and time of publish, and the profiles used for uploading. If any of the files fail to get uploaded, then you can try again with the Retry Failed button.
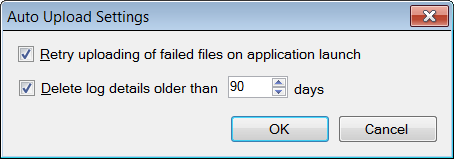
You can configure the Auto Upload settings so that as soon as the application is launched, it will retry uploading the failed files. These settings help to maintain the Auto Upload Log by erasing the old records.
Related Topics
|