Schedule Recording
A scheduler will help you to start recording at a specific time, performs the recording, and close automatically. You have to specify the time for the recording to start and the duration for the recording to stop.
To schedule recording:
Click Tools >> Schedule Recording.
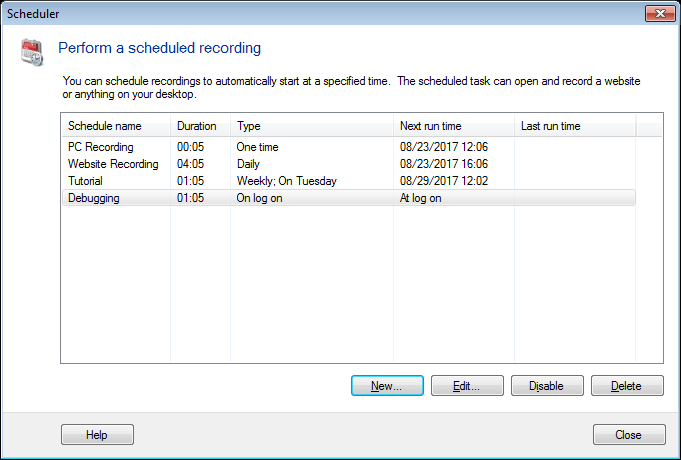
All the scheduled recordings are displayed in the list. Click New to schedule a new recording. To modify a scheduled recording that is already present, select Edit. If you don't want to run a scheduled recording anymore, select the schedule and click Delete. You can select Disable, if you don't want a recording to run at specified time.
Select Recording Options
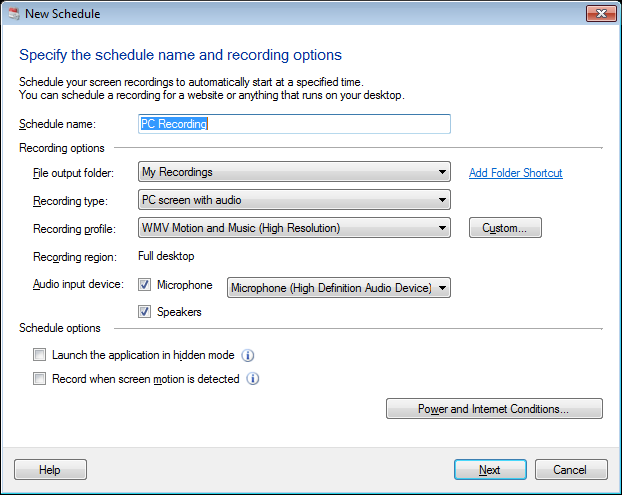
Specify the name of the task to be scheduled, and a folder to save it in. The scheduled recording is saved with the specified task name, appended with current date and time.
If you want audio to be recorded with video, select the option PC Screen With Audio in the Recording Type dropdown. If you do not want the audio to be recorded, choose the option PC Screen Without Audio.
Select the Recording profile to be used for the scheduled recording. Along with the in-built profiles, Custom profile option is provided. The customizing options allows the user to adjust the audio and video settings for the media files.
When multiple monitors are connected, the Recording Region is seen as a dropdown list. You can choose a monitor to be recorded from this list. For a single monitor, full screen is recorded.
You can enable the option Launch the application in hidden mode so that when the application is minimized, it is not visible in the taskbar. The recording takes place in the background. Click Next.
Audio Input Device
You can use a microphone to add your own audio narration when demonstrating any application or website. Recording from the microphone is useful when you want to narrate as the screen is captured. You can select the Microphone if you want to record your narration with the video. The Speaker option should be selected when you want to record the audio present in the application itself. For example, while capturing a game, you might want the game sounds to be present along with the video in the recording.
You can use the speaker option along with the start action Start a program by setting the program as Windows Media Player from the Start Program dropdown list. You can also provide the file name that you want to play when the scheduled recording executes.
Power And Internet Connection Options
You can limit to start the scheduled task by choosing the Power And Internet Connection Options. Choose to invoke the task only if AC power supply is provided to your computer. Another way to schedule a task is to start recording as soon as you wake up the computer. You may also choose to invoke a scheduled task only if the internet connection is available.
Selecting Task Run Time Options
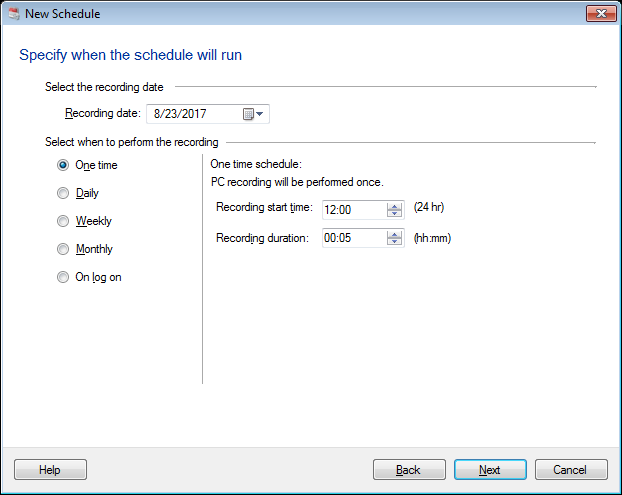
Select the start date and expire date for which the scheduled task should be valid and should be invoked. You can select the schedule to be invoked once, daily, weekly, monthly or on logging in the machine.
When can you schedule the recording
-
One Time: The scheduled recording is performed only once at the selected date and time for the specified duration.
-
Daily: Select the Start Date and Expire Date for which the scheduled task should be valid and should be invoked. The recording starts at the time mentioned and stops after the specified duration. You can choose the interval of days after which the recording should be performed by setting the option Record every. For instance, you can schedule the recording every 2 or 3 days.
-
Weekly: The scheduled recording is performed weekly on the selected days. You can choose to recur the schedule every week by setting the option Record Every to 1.
-
Monthly: The scheduled recording is performed monthly in the selected months. You can choose days of the month for recording. Choose the weeks of a month and in turn, days of the week for recording. The recording starts at the specified Recording start time and is performed for the specified duration.
-
On Log On: With this option the scheduled recording is performed every time a user logs in to the PC. You can choose to record screen for specified recording duration or until you logs off your computer.
Note: In case of "One Time" schedule the task expire date cannot be selected, as a "One Time" schedule automatically expires after it has been invoked at the specified time.
Selecting Start and End Actions of the Recording

You can select to perform certain actions before starting the recording and/or after completing the recording. These actions act as notifications prior to starting the recording and after the completion of recording.
Actions to be performed to notify start and end of your recording
There are several predefined actions those can be performed, to alert you when the scheduled recording starts and ends. You can Start a program to indicate the start of recording. From the select program dropdown, you can either select a Default Web Browser or Windows Media Player. You can specify any custom program from the Other Program option. Parameters can be passed to the selected program. For instance, you may record your favorite website by choosing the option Default web browser, and passing the URL of your website as a parameter.
Another action that can be performed is by displaying a message box, to notify the start and end of a screen recording. The message box displays the title and the message to be shown. You must click Ok to start recording, or click cancel to discard it. When the recording ends, you must click OK in the message box to complete the scheduled recording.
An overlay message can be shown to indicate the start and end of recording. You can specify the message, duration, the desired color for text and background, and the position of the overlay message.
Another action to notify completion of your recording is to send an email.
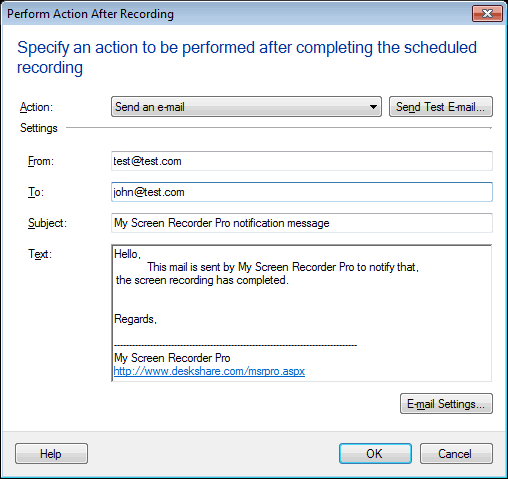
Specify a valid e-mail address in the 'From' and 'To' fields. You can also specify the Subject. As soon as you complete the recording, an email is sent to the recipient. A notification is displayed on the application status bar.
Testing Email Settings
To test whether an Email is sent successfully or not, Click Send Test E-mail.
Sending E-mail using an Outgoing Mail Server
All ISPs provide configuration instructions for sending and receiving e-mail using an e-mail client like Microsoft Outlook. The instructions also contains the address of the outgoing (SMTP) mail server.
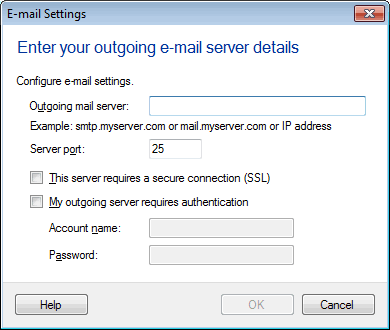
To send e-mails using an outgoing mail server, select E-mail Settings option. In the Outgoing Mail Server option, specify the name or address of the outgoing mail server. Most outgoing mail servers use Port 25 for communication. If your ISP's outgoing mail server uses a different port then specify it in the Port option.
You can select the Outgoing mail server requires a secure connection (SSL), to ensure the security of your e-mail. If the outgoing mail server asks you to log in before sending e-mails then check the Outgoing mail server requires authentication option. Specify the login information in the Account name and Password options.
When you add send an E-mail action, My Screen Recorder Pro will send an e-mail after successful completion of your recording.
|