Triggering an Alert when Motion is Detected
By default, Security Monitor Pro triggers an alert when motion is detected. Security Monitor Pro is equipped with an advanced motion detection algorithm that automatically monitor changes in the images sent by your camera.
To trigger an alert when motion is detected, click Camera >> Manage Cameras >> Edit Camera >> Actions and select the option When motion is detected.
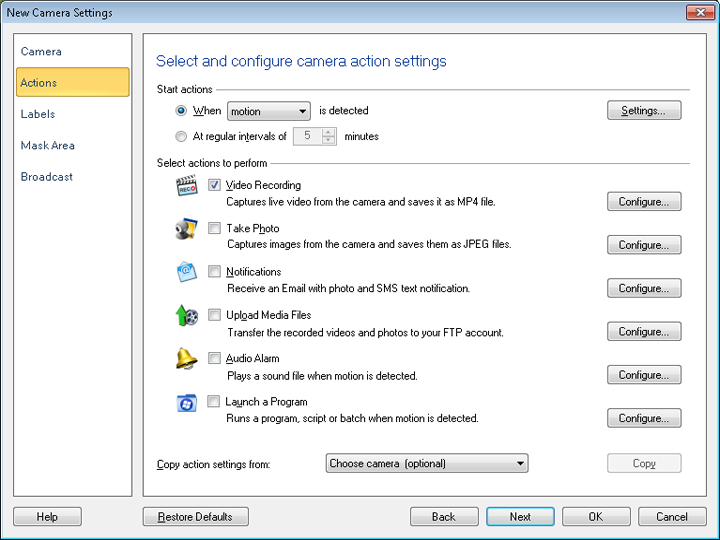
Copy actions settings from: Using this feature, you can copy the same action rules which you have saved for other cameras. This option will appear when you have at least one camera added in application. This option comes in handy when you want to quickly add the same actions as configured for other camera.
Before starting Monitoring for Motion, configure the Motion Settings.
Masking an Area to Avoid False Alarms
The Mask Area feature allows you to block motion detection in a particular area. You can select an area to mask in the preview window. This reduces the possibility of unwanted triggering of alerts. For example, if you want to monitor your garden but do not want the motion on the road outside to trigger an alert, then you can mask the portion of the preview that shows the road. Each camera can be masked individually.
To define a mask area for your camera, click Camera >> Manage Cameras >> Edit Camera >> Mask Area.
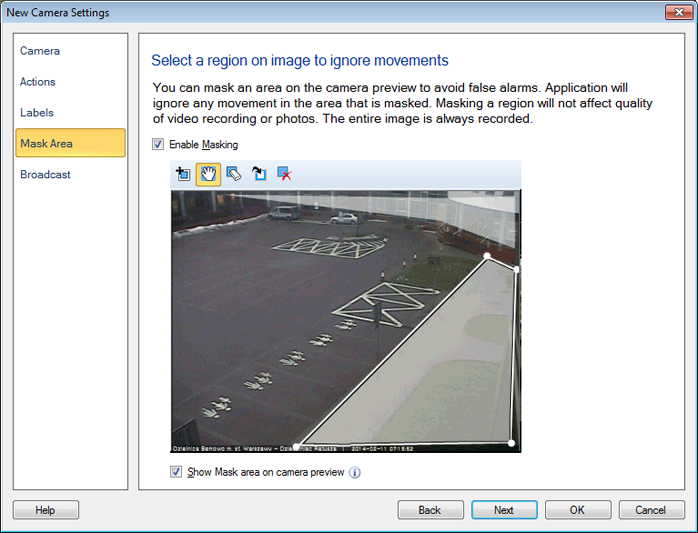
In the dialog that is displayed you can select and mask an area in the preview window. Check the Enable Masking option.
Use Show Mask area on camera preview option when you want to view mask area on camera preview window.
Mask Area toolbar details
The following section describes each tool on Mask area toolbar in details:
|