How to create or Edit a new connection profile?
How to Create or Edit a FTP Connection Profile
You should begin by creating a Profile for each FTP server that you will be working
with. A Profile contains the necessary information to connect to the
server.
Click File >> New Connection Profile.
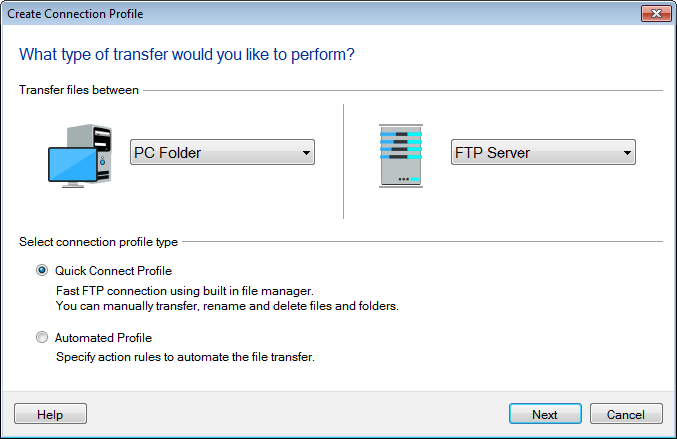
The next step is to specify the two folder locations
to transfer files. Both the folders can be on a PC, FTP, mobile device or remote PC.
Choose the type of connection profile as Quick Connect
Profile or Automated Profile.
Quick Connect Profile allows you
to use the File Manager to manually transfer files between folders using Transfer queue. The File Manager window is divided
into two panels, each showing an explorer-style interface. The files can be
dragged from one panel and dropped to other making the transfer easy.
Automated Profile is used to automatically transfer the files between
the folder selected. For example, if you want to transfer files
automatically between a PC folder and FTP server, you need to configure the automated rules after providing the path
of the folder and FTP connection details. Below examples will help you to configure PC to FTP, PC to Mobile and PC to Remote PC connection profiles.
1. If you are transferring files between a PC
folder and FTP server, you need to provide the path of the folder and FTP connection details as shown below:
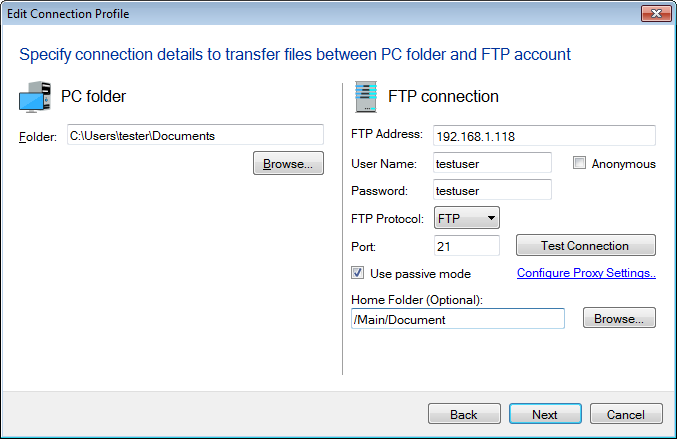
FTP Connection
FTP address: Enter the Host Name (Example:
ftp.myserver.com) or IP Address of the FTP Server.
User name and Password: Enter Username and
password to connect to your FTP server.
Anonymous: Check this option if you want to
connect to the FTP server as an anonymous user. If Anonymous
user is checked, you can't enter a User Name and Password.
Port: The Server Port is the port on which Auto
FTP Manager will try to connect to the FTP Server. This is normally 21;
however, it may be different if you are going through a firewall, or if the FTP
Server administrator has assigned the FTP protocol to another port.
FTP Protocol: Auto FTP Manager supports
different protocols FTP, FTPS and SFTP. For details, click
here.
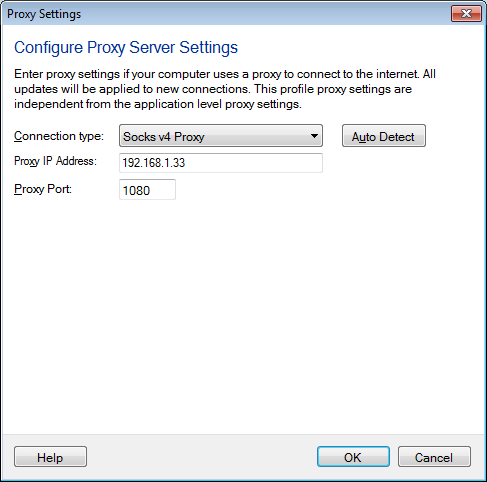
Configure Proxy Settings: You can use
a proxy server to connect to your FTP account. Each individual profile can
have its own proxy selection.
-
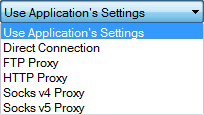
Connection
type: This defines how to connect to the FTP
server. By default, Use
Application's Settings option is selected. This
will apply proxy which is saved in the Application's Proxy Server
settings.
If you do not know the proxy details, you can click
on the Auto Detect option. This option detects the Proxy settings
configured in Internet explorer and displays them in the respective
fields. If that does not work, then you may need to contact your Network
Administrator for assistance
Connection Modes [Passive or Active]: FTP may
run in active or passive mode, which determines how the data connection is
established. By default, this mode is set to Passive. For details,
click here.
Remote Folder (Optional): You can choose to
enter or select default remote folder by clicking on
Browse.
2. If you are transferring files between a PC
folder and Mobile device, you need to provide the path of the folder and Mobile connection details as shown below:
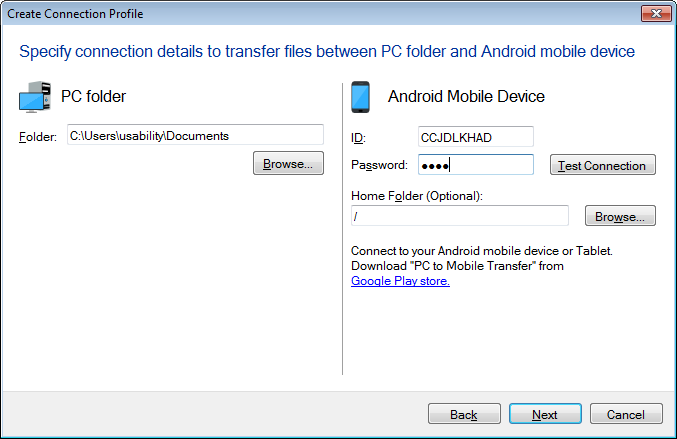
Mobile Connection
To use this feature, you will need to install PC to Mobile Transfer App on your Mobile device. Get it now from play.google.com/store
ID and Password: Enter the ID and Password generated on Mobile device.
3. If you are transferring files between a PC
folder and Remote PC, you need to provide the path of the folder and Remote PC connection details as shown below:
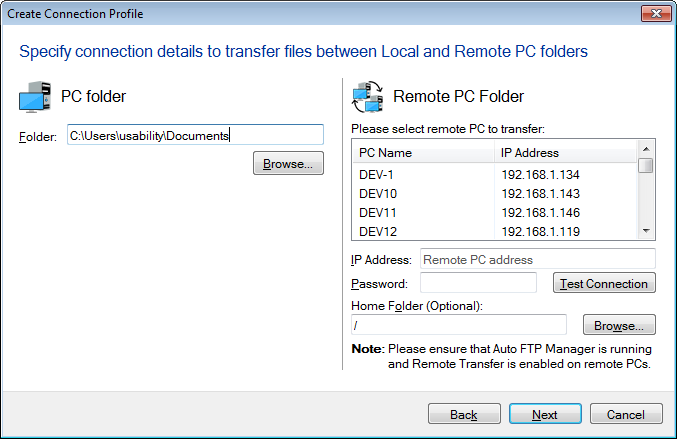
Remote PC Connection
To use this feature, Auto FTP Manager must remain running on your PC. All the PCs present in your local network will be automatically listed. You can select the PC from the list or you can manually add IP address and password of PC present in the local network. You should know the password of remote PC to perform file transfer.
IP address and Password: Enter the IP address of remote PC. To view or set the password, go to Settings >> Remote Transfer. Make sure that on remote PC Enable Remote Transfer option should be checked to allow file trasfer on the remote PC.
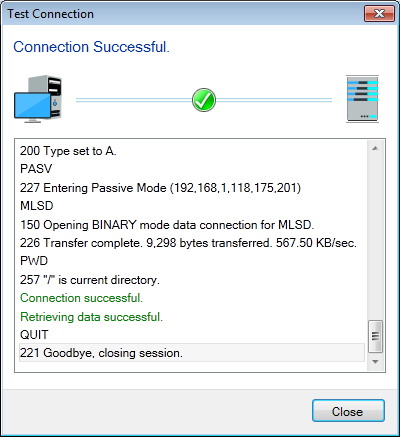
Click on Test Connection to check
whether the connection with your server is successful. If your PC is connected
to the server via a proxy, you need to configure
the proxy settings.
In case of transferring files to FTP, if the connection is not established with the entered username and password then Auto FTP Manager will automatically try to connect using Anonymous Login.
If you are not able to connect using the current
configured settings, then Test FTP Connection helper will:
- Automatically change the connection type to Direct Connection if Proxy
Server is used.
- Switches the protocols and update the Wizard with the new settings once
successful.
Click on the Next button to open the Final
Wizard for a Quick Connect Profile. For automated Profile, specify the Automated Transfer Rules first and then
proceed to the Final Wizard.
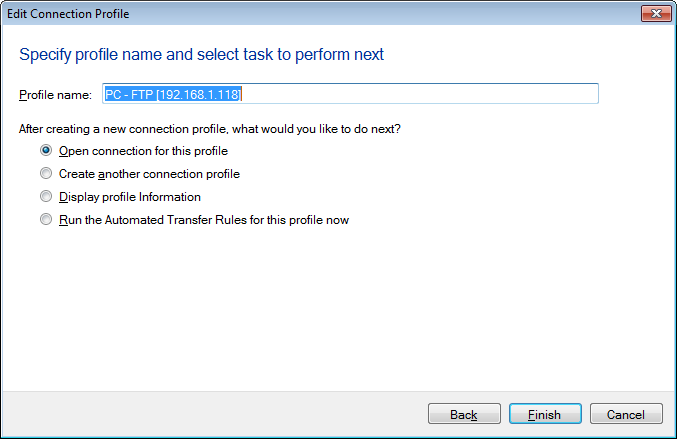
Provide a Profile name for your
connection. In addition to the profile name, you can choose some quick
tasks to perform next. Select Open connection for this profile, to
open it in File Manager and immediately start
transferring your files. For an Automated Profile if you choose Run the
Automated Transfer Rules for this profile now then automated profile will
start executing. If you have to create more transfer profiles, choose the option
Create another profile. To view the connection details of this
profile and just continue using it without any further actions, choose the
option Display profile
Information. Click on Create button and your profile is
saved and listed in the Connection Profile
Panel.
|