Create DVD Video
Make your own DVD video that can play on a standard DVD player. Many different video file formats are supported, such as WMV, WMV HD, VOB, MPEG-1, MPEG-2, AVI, DIVX, MOV and MPEG-4.
Click File >> Create DVD Video.
Media Explorer and Storyboard
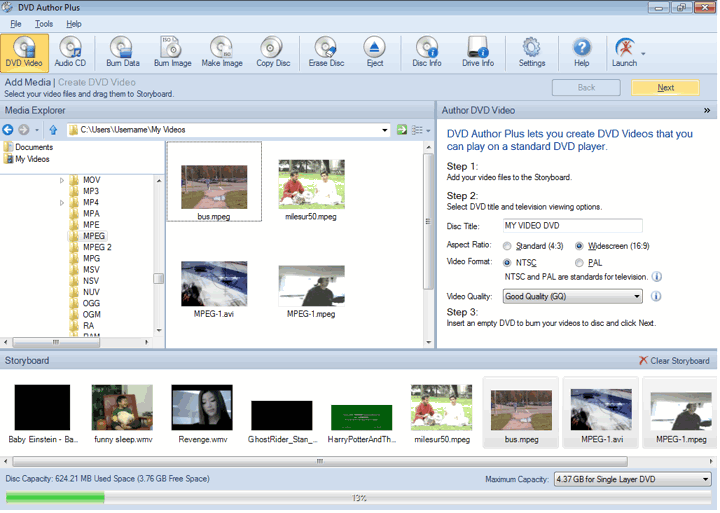
To create a DVD, add the video files to the storyboard from Media Explorer. A storyboard is a graphic organizer that displays thumbnails of the files that you add. You can drag the files from the media explorer and drop them to the storyboard. Pre-visualize the files in the storyboard before proceeding to the next step.
At the bottom of the application is the progress indicator which shows the available and occupied space on the disc.
Author DVD Video Section
The standards used for TV broadcast vary in different countries. Video Format includes two television standards, PAL and NTSC. NTSC is the video standard used in United States, Japan, Canada, and most of the Latin America. PAL (or SECAM, which is very similar to PAL) is used in UK, Europe, Australia, and most of Asia. The suitable option is already chosen for you based on the region and language settings in your control panel. Before creating DVD video discs, check the TV standard of the place where the DVD is going to be used. Select the video format accordingly.
NTSC set-top DVD players usually cannot play PAL-format discs. Most PAL set-top players can play both formats.
The aspect ratio is expressed as the ratio of width of the image to its height. It can be set to 16:9 (for widescreen) or 4:3 (for standard screen) depending on which screen your DVD will be played back. Play your video by right clicking it in the storyboard and test it. If the video appears to be stretched horizontally, choose 4:3. If the video appears to be squashed horizontally, choose 16:9.
Choose the video quality from the dropdown. High Quality creates the best videos but take up the maximum space on the disc. You can record the videos of the duration for about one hour.
Good Quality lies between the Standard Play (explained further) and High Quality. It records for about one hour 30 minutes. In Standard Play quality, the quality is balanced with the duration. You can record up to two hours of video on the disc. In Standard long play, the quality lies between standard and long play option. The duration of created video DVD is 2 hours and 30 minutes. With Long play quality, more data can be squeezed on the disc but not all players can play these videos. It can fit about three hours of video but the quality is like that of the video CD.
Burn DVD Video or create ISO image
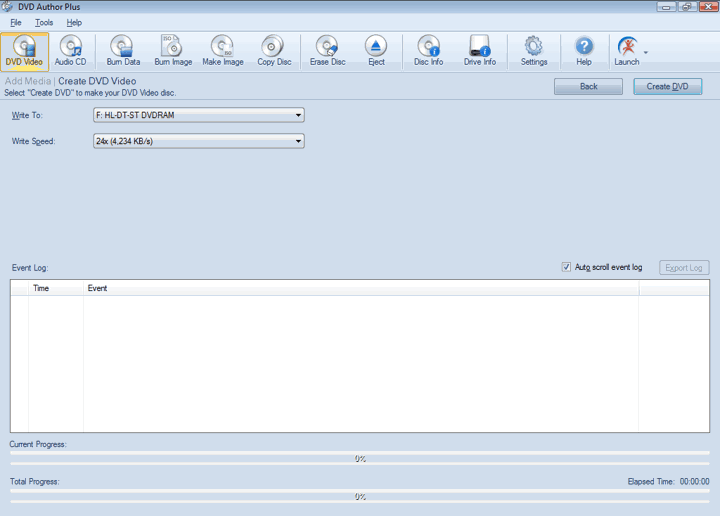
After adding the files, the next step is to burn them on a DVD. All the disc drives connected to your PC are listed in the Write To combo box list. The speed at which the data is written on a DVD can be selected from the Write Speed dropdown. Choosing a higher writing speed results in faster disc burn, but may result in a slightly degraded performance when reading the disc. Lower writing speed takes a little extra time but produces optimum results.
You can choose the option Image Recorder to create an ISO image. This image is an archive file of your DVD, composed of all its contents. It can be considered as a true digital copy of the original DVD.
An advantage of creating an ISO image is that it can easily be burned to a CD or a DVD and can be used as a backup of your data.
Click Create DVD to start the burning process. At the bottom of the application, the indicators show the status of burning process. When you click Create DVD, the Event log is updated at each stage of burning process.
|