Applying Effects to your Recordings
You can make your screen recordings more illustrative and interesting by applying various effects. Click Tools >> Settings >> Effects.
Changing the Mouse Pointer Appearance
To change the appearance of the mouse pointer in your recording, click Effects >> Mouse Pointer. Change the system mouse pointer or choose a mouse pointer from the provided dropdown list. You can opt to use a custom pointer by specifying the path of the cursor file.
Highlighting Mouse Movements and Mouse Clicks
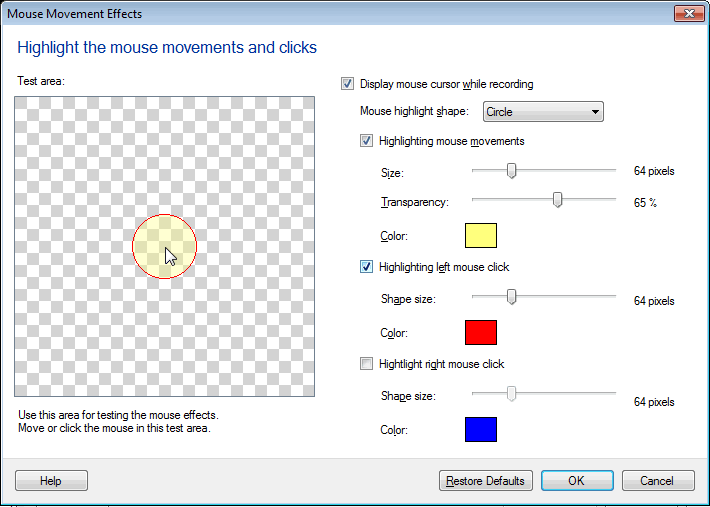
Highlighting Mouse Movements and Mouse Clicks easily draws the attention of your audience when pointing at certain elements. It is an effective way of making sure that your cursor never gets lost in the background.
To highlight the position of the mouse in your recordings, select the option Enable highlighting mouse movements.
Choose a shape to highlight the mouse position from the Mouse highlight shape dropdown list. Optionally change the size and color of the selected shape and also set the transparency value of the color using the slider.
Emphasizing mouse clicks can be helpful when you are creating a demonstration. You can choose to highlight the left mouse click, the right mouse click or both. To distinguish the left from the right mouse click, you can set different colors and sizes for each click. You can use the test area to test and confirm the effects' settings.
You can enable and disable the mouse highlights by clicking the Effects menu and selecting or deselecting the mouse highlight options. The mouse effects will appear when you play back your recording. They will not appear while you are creating the recording.
Stamping your recordings
Stamping means marking your screen recordings with some captions. You may want to include some information in the screen recording. For example, you can add the company name in the recorded video as a text caption.
You can add the time of recording, elapsed duration, and a text caption in your screen recordings by clicking the options Display System Date and Time, Display Elapsed Time and DisplayTextCaption.
Stamping your screen recordings with system date and time helps when you need to know the time of occurrence of an event.
You can choose to show Elapsed time which specifies the time that has passed since the capture began. If at any point, the recording is paused, the time the elapsed time pauses. With this option you can figure out how long it takes to perform a specific action.
With the option Display Text Caption, you can display any information about the screen recording during its playback.
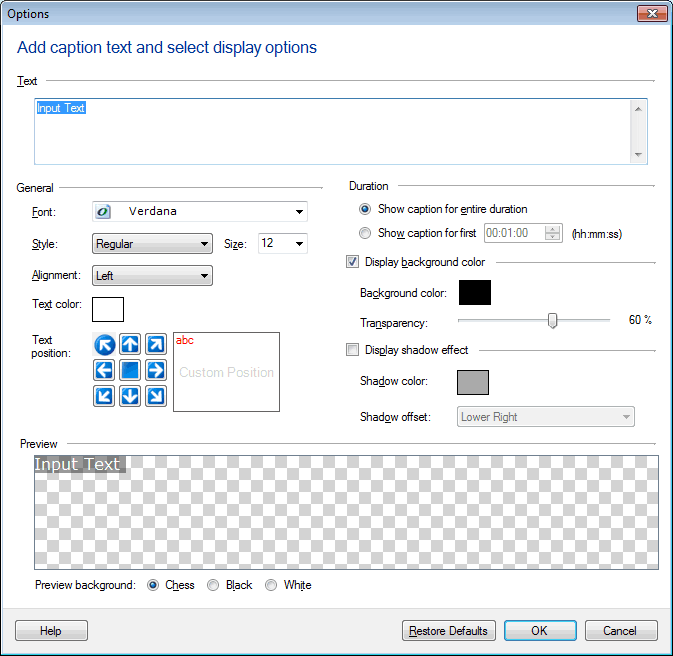
To create a text caption, click the New button on the Annotations window and type it in the text area. Set the Font, Style, Alignment, Color and Position of the text. The caption can be shown for the entire duration or for a specified duration.
Once you have selected any effect during the recording, the configured Settings are applied. Otherwise, default settings are applied.
Note: To avoid recording the application menus and yourself turning effects on or off, you can use the keyboard shortcut to pause recording, then resume recording after you have changed the settings.
Image Overlay
Using image overlays, you can add watermarks or logos to your screen recordings.
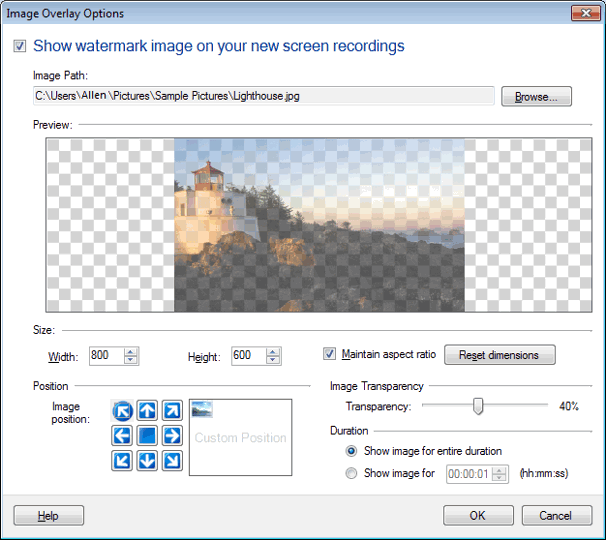
Select an Image by clicking on Browse. You can see the image in the Preview. You can resize your image file by adjusting its width and height. If the Maintain Aspect Ratio checkbox is selected, the height and the width is maintained proportionately.
Set the Image Transparency by changing it from 1% to 90% using the slider. When transparency is set to 1% then you can't see anything beneath the image. When Transparency is set to 90% you will see whatever is beneath the image.
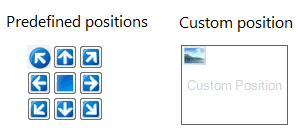
To position an Image on the recording screen, either select the predefined positions or a custom position by moving the image at the deisred location.
Select the duration option as needed. Either have the image on screen for the complete recording duration or for some desired time.
Note: This option will be visible for Windows Vista and above.
Screen Draw
With Screen Draw, you can use your mouse to mark and emphasize any text or diagram on your PC screen. This makes your demonstration and interpretation even clearer. You can use different colors and widths for your drawing. There are certain keyboard shortcuts that allow you to start the Screen Draw when recording is in progress. These shortcut keys allow you to work with this tool for drawing, erasing, changing the tool tip size, selecting the pen or the highlighter, and much more.
Click Tools >> Settings >> Effects >> Screen Draw.
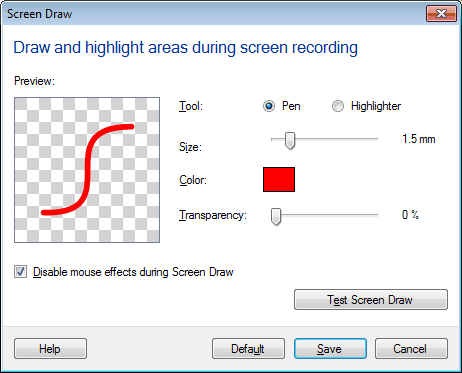
You are provided with two tools - a pen and a highlighter. You can use the pen for drawing or writing on the screen. When recording your screen for example, a presentation, you may want to give stress on certain points. With the highlighter tool, you can easily mark the points to get the viewer's attention. You can set the thickness of the highlighter as well as the pen with the help of the slider. When you choose a pen, in addition to its thickness, you can also set its transparency level. There is a small preview window where you can see the thickness and the transparency level that you have chosen. When using screen draw during recording, if you want the mouse effects also to be displayed uncheck the option Disable mouse effects during Screen Draw.
My Screen Recorder Pro allows you to first test the Screen Draw feature and practice with it. Click the Test Screen Draw button.
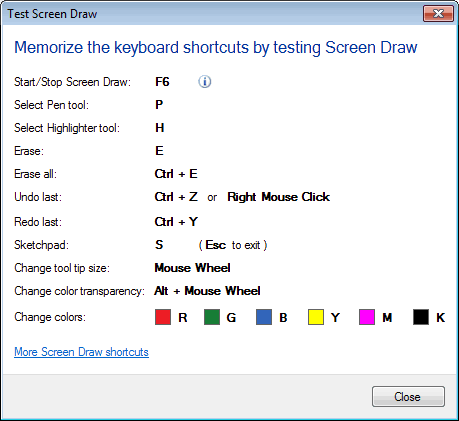
You can see the keyboard shortcuts that must be memorized and used to implement each functionality of Screen Draw during the screen recording. When you start the screen recording, at any point you can start or stop the Screen Draw by pressing the F6 (by default) function key. You can also change default hotkey for Screen Draw tool from Settings >> Keyboard.
For more information about each of the Screen Draw tools, click Screen Draw shortcuts.
|