Creating Data Disc
Data discs can be used to store any type of files, including documents, programs, video and audio files, images, etc. You can share the data discs among different computers and use them as secure backup. The CD or DVD player that you use to play your data disc must support the format of the files present on the disc. For example, if there are some WMA files on the disc but your player supports only MP3 format, you will need to convert your files to MP3.
A multi-session disc is where data can be added incrementally in more than one recording. A new file is added to the empty space of the disc. Each time you write to a multi-session disc, it is called one session. Import session option allows you to add new files to the existing ones.
As you add a session to a multi-session disc, the available free space is reduced.
When a disc is "Finalized", no more data can be added to it. The existing files are permanent and can't be deleted.
Click File >> Burn Data.
To add files to a multi-session disc, click File >> Import Session. All the files on the disc in the current drive are added to the Data Disc Preview.
Note: Click Import Session before selecting the files, or all entries in the Data Disc Preview will be lost.
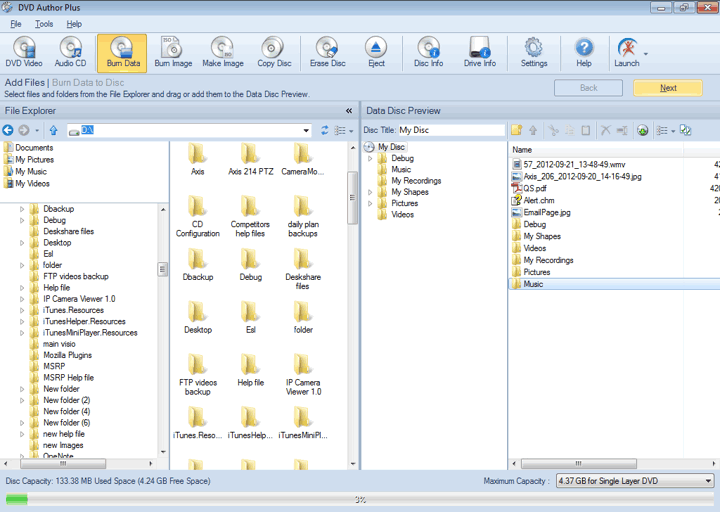
Add files to the Data Disc Preview from the File Explorer. You can drag the files from File Explorer and drop them in the Data Disc Preview. At the bottom of the application window is the indicator that shows the available and occupied space on the disk.
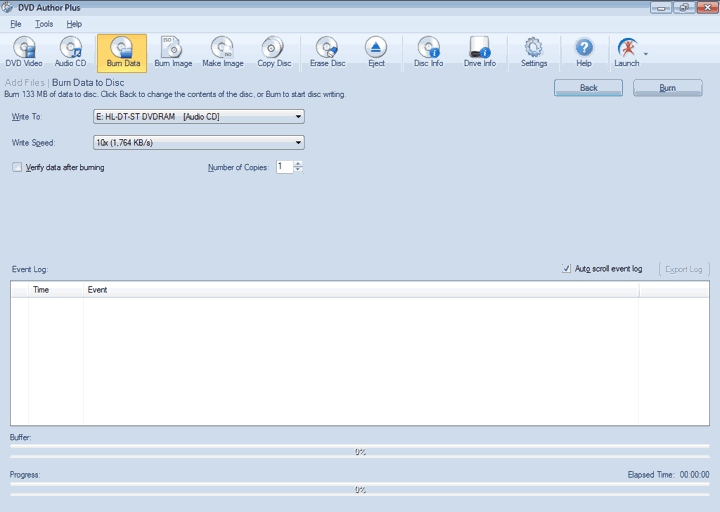
After adding the files, the next step is to burn them on a data disc. All the disc drives connected to your PC are listed in the Write To combo box list. The speed at which the data is written on a disc can be selected from the Write Speed dropdown. Choosing a higher writing speed results in faster disc burn, but may result in a slightly degraded performance when reading the disc. Lower writing speed takes a little extra time but produces optimum results.
You can choose the option Image Recorder to create an ISO image. This image is an archive file of your DVD, composed of all its contents. It can be considered as a true digital copy of the original DVD.
An advantage of creating an ISO image is that it can easily be burned to a CD or a DVD and can be used as a backup of your data.
You can optionally check the option Verify data after burning. After the disc is completely written, DVD Author Plus reads all the files from it and compares them to the original ones, guaranteeing that no data was lost during the burning process.
Click Burn to start the burning process. At the bottom of the application, the indicators show the status of the burning process. The Buffer indicator shows how much data is ready to be written to the disc. If this indicator drops too low, there is a risk of the disc creation process failing. If this situation occurs, lower the Write Speed. When you click Burn, the Event log is updated at each stage of burning process.
|