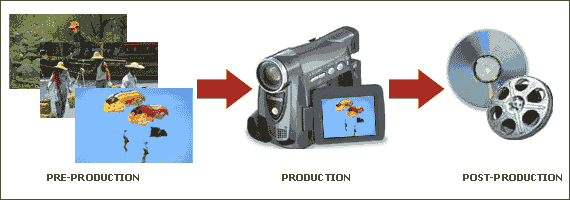
Planning and Shooting your Videos
Every video captured by
your camcorder is a
story waiting to be
told. It could be
the story of your
child’s first tentative
steps, a typical day in
your life, your
daughter’s little league
game, or that perfect
vacation with your
family.
All you need is
creativity, a structured
and organized plan, a
little discipline and a
capable video editor
like
Video Edit Magic.
This article aims to
explain how you can
adapt the basic
principles of
professional movie
making to your home
videos.
PREPRODUCTION
Outline:
Preproduction involves
the steps you should
take before shooting a
video with your
camcorder. At
first glance, this looks
unnecessary for
impromptu home videos,
but it really is one of
the most essential
things in videography,
professional or
otherwise.
Serendipity can only get
you a great shot every
now and then. Your
videography skills will
always get exposed to
criticism over videos
that last longer than a
minute or two. So,
you need to have a plan
(or at least a rough
outline ).
When planning a video shoot, write down a list of shots you will need.
For example, let
us consider your
daughter's softball
game. You can make
a checklist listing the
following ‘must have’
shots.
- A close
shot of
your
daughter
putting
on the
team
cap.
- A close
up of the
team list,
with a slow
zoom in to
her name.
- A long shot
of the park.
- The team
practicing
and warming
up.
- Shots of the
scoreboard
before,
during and
after the
game.
- A few shots
of the
crowd.
- A close up
of the
players
smiling
after the
game.
- A long shot
of the sun
setting.
Once you have a
checklist or an outline,
you at least know what
sort of footage is
important. An
outline also helps if
you have some existing
footage. It will
guide you in fitting the
existing footage around
your concept.
Know your equipment:
As basic as it might
sound, it is a good idea
to explore each and
every button and control
of your camcorder.
Do read the user manual.
There is nothing as
frustrating as missing
out on a good shot due
to unfamiliarity with
the controls. Know
all the buttons inside
out. If you have
the option to configure
your camcorder to a beep
on starting and
stopping, then turn it
on. Take a few
practice shots for
zooming in and zooming
out and any other
special controls.
PRODUCTION
Always shoot as much
content as you possibly
can. You will
appreciate this habit
when you edit in the
post-production stage.
The content could
include video footage,
snapshots and sounds.
During the production,
follow the suggestions
below to shoot great,
professional looking
videos.
SHOOTING TIPS
- Use a
Tripod:
A steady
home
video is
a rare
achievement,
even if
your
camcorder
has an
image
stabilization
feature.
You
should
mount
your
camcorder
on a
tripod
whenever
possible
to avoid
jerky-looking
videos.
- Lighting:
Perhaps the
most
important
aspect of
video
production
is the
lighting.
A common
mistake most
amateurs
make is to
shoot
towards the
sun.
Whenever
possible,
try to keep
your back
towards the
sun, while
keeping your
shadow out
of the
frame.
The same
principle
applies
while
shooting
indoors.
If you shoot
in a bright
light, then
your subject
might appear
dark.
Try to shoot
in front of
backgrounds
with uniform
lighting to
avoid bright
spots or
reflection.
- Smooth Zoom
in and Zoom
out:
Abrupt
zoom-in and
zoom-outs
never look
good in home
videos.
Always
zoom-in to
and zoom out
of subjects
slowly.
Start by
framing the
subject for
a second or
two, then
zoom in very
slowly.
After
completing
the zoom-in,
hold the
camcorder on
the subject
for a moment
before
zooming out
or panning
away.
Other handy tips:
While shooting an event,
take good shots of
relevant text documents,
invitation cards,
banners etc. These
can prove to be useful
during post production
for making title slides.
Most camcorders these
days come loaded with
special effects.
If possible avoid the
urge to apply special
effects while shooting.
This is to prevent being
stuck with garish
looking videos which
cannot be changed.
As much as possible,
leave the special
effects and other
editing operations to
the post production
stage.
POST PRODUCTION
Post production involves
organizing all your
videos, editing them
using software like
Video Edit Magic,
and then
getting them out of the
PC in a format
appropriate for
distribution.
You shoot for hours, but
the actual video must
hold the viewers'
attention. The art
of editing is to tell
the whole story in a
shorter, crisp
narrative, without
losing anything
essential. Editing
gives you a chance to
play with space and
time. Videos are
entertaining because
they are larger than
life. They ability
to create a world
different from and more
intriguing than the
daily world people live
in. You can
transport a person from
one location to another.
You can move people to
other places, even other
worlds, using
the green screen effect.
In a video production
audio plays a pivotal
role in telling a story.
Video Edit Magic
provides you with
unlimited possibilities
of creating
audio effects,
similar to visual
variations that you can
bring in by
applying video
transitions.
The last step is
selecting a distribution option for easy sharing with
your family and friends.
A video can make people
laugh or cry. A
story told by video can
grab the audience and
refuse to let them go.
Using the techniques
described in this
article, and Video Edit
Magic, you can create
your own video
masterpiece. When
people see the final
product they will refuse
to believe that you are
not a professional
movie-maker!